Welcome back to my blog. I had so much fun making these cards. I stamped and painted one large image then cut it into three pieces to create three cards. You can also see my cards on the Magenta blog here.
I stamped the Floral Background stamp onto a piece of Stonehenge Aqua Coldpress black watercolor paper with VersaMark ink, then embossed with gold embossing powder.
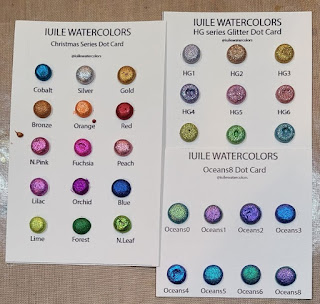
I taped the piece to a board to keep the paper flat while I painted the flowers, leaves and berries. I used Iuile watercolors that I found on the Etsy website. If you follow Kristina Werner, you may have seen her use these watercolors on a Christmas card (which you can see here) or a Valentine card (which you can see here.) I am in love with the rich colors and beautiful shine of these paints. Iuile makes these great dot cards with very generous samples of many colors and they are very reasonably priced. There’s more than enough paint on a card to do several projects so you can definitely try these before you decide to purchase the larger sizes. You can see Iuile’s Etsy store here. After I completed the painting, I let the piece dry thoroughly. The watercolor paper I used is kind of delicate and to get a clean cut you need to use dies or a guillotine cutter. I used the small stitched square dies from Gina K’s Master Layout set #4 cut out two 2 3/8” squares from one side of the image. Then I used guillotine cutter to cut a strip 1 5/8” x 5”. I cut pieces of coordinating solid color cardstock to mat each of the images. I also cut cream cardstock – 3 ¼” x 4 ½” for the square images and 3 ¾” x 5” for the vertical piece. I stamped the sentiments and embossed the images on the cream cardstock (gold embossing powder for the happy birthday, clear embossing powder for the other two cards.) I positioned (but didn’t attach) each painted image on a piece of cream cardstock. I wanted to add a bit of interest to the cream cardstock so I used VersaMark ink to stamp the small flower petal from the Petal Blossoms set a few times around the image and sentiment, then lightly brushed on Heirloom Gold Perfect Pearls. I adhered the cream cardstock onto pieces of solid cardstock, adhered the painted images and then adhered everything to an A2 card.Thanks for visiting my blog today.
Magenta Products Used
 |
| 07.588.J - It's the Little Moments |
 |
| 07.817.H - May the Love |
 |
| 07.975.I - Happy Birthday - Large |
 |
| 14.660.R - Floral Background |
 |
| Cset46 - Petal Blossoms |
Other Products Used
Iuile Watercolor Paint
Gina K Designs Master Layout Set #4
VersaMark Ink
VersaFine Black Onyx Ink


