Showing posts with label Iuile Watercolors. Show all posts

Friday, November 12, 2021

Sparkling Autumn Birthday

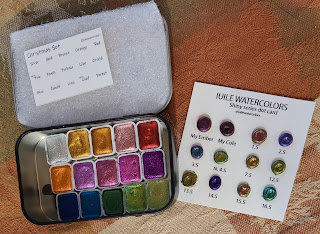
Welcome back to my blog and Magenta Super Saturday. Today I used my sparkly Iuile watercolor paints to create a fall themed birthday card.  You can see my card on the Magenta blog here.  I love the sparkle from the Iuile’s paints.  Kristina Werner uses them frequently on her blog posts.  My card was inspired by one of her videos which you can see here.

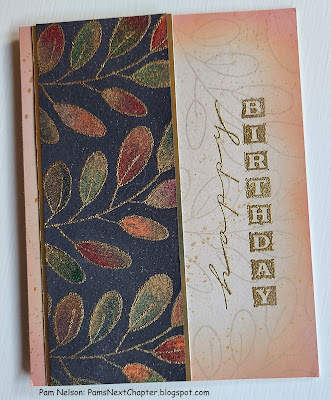
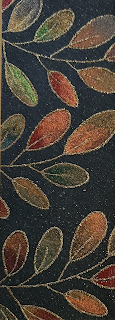
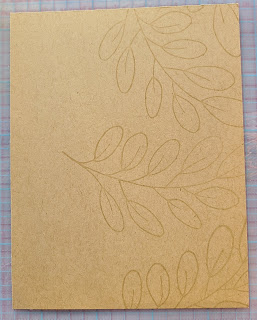
I stamped the large Acacia branch repeatedly on a piece of Stonehenge black watercolor paper that was cut to 2” wide by 5 ½”.  I have found that this paper cuts best with a guillotine cutter.   Before stamping I generously used my powder tool over the surface of the paper, stamped with VersaMark ink, then embossed with gold embossing powder. 

I painted the leaves using a variety of fall colors – gold, orange, red and green, from Iuile's Christmas set and Shiny Series.  All of these paints are so beautiful but they are especially beautiful when used on dark paper.  For a bit more sparkle I lightly splattered gold watercolor on top. When the water-colored piece was dry, I adhered it to a piece of gold metallic paper that was cut to 2 ¼” x 5 ½”. 
I created an A2 card with Kraft cardstock, then stamped the acacia branch repeatedly on the right side of the card with VersaMark ink then dried the ink with my heat gun. 
I stamped the vertical happy birthday stamp on the right side of the card, then embossed it with gold embossing powder.  I applied Tea Die Distress Oxide ink around the outer edges of the card, followed by Crackling Campfire then splattered a bit more gold watercolor paint for a bit more sparkle.  To complete the card, I adhered the water-colored strip to the left side of the card.

Thanks for visiting my blog today. 

Magenta Products Used:

07.430.I - Happy Birthday

0817.M - Acacia Branch Large

Other Products Used:

Iuile Watercolors (available from Etsy.com)

Stonehenge Aqua Coldpress Black Watercolor paper

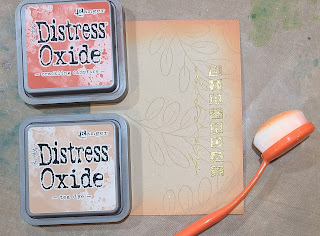
Distress Oxide Ink (Tea Dye, Crackling Campfire)

VersaMark Ink

Brutus Monroe Gilded Gold Embossing Powder


Friday, June 18, 2021

Christmas in June

Welcome back to my blog and Magenta Super Saturday.  I’m trying to get a head start on my Christmas cards.  Today I’m using a panel that I created in a previous blog post.  You can also see my card on the Magenta Blog here

In my previous post, which you can see here, I created a card using alcohol inks and alcohol lift ink. 
I covered a piece of Dura-Lar acetate with alcohol inks, then used alcohol lift ink to stamp and lift the ink from the acetate panel. 
I then stamped the image onto a piece of white cardstock.  That’s the piece I’m working with today. 
The rest of this card came together very quickly.  I trimmed the stamped image to 4” x 5 ¼”, then placed it in my stamp positioner to stamp the image with VersaFine Blue Lagoon ink. 
I used a blending brush to apply Mermaid Lagoon Distress ink around the outer edges.  To add a bit more interest, I splattered some Iuile Silver watercolor paint over the image.  I love the Iuile watercolors, and the silver paint really sparkles. I mounted the panel on a piece of dark blue cardstock and then mounted them onto an A2 card.  To finish I added clear rhinestones to the center of each “ornament”.  

This card was super simple, and very quick to make.  I wish you could see it in person because the silver paint and the rhinestones really make it sparkle.

Thanks for visiting my blog today.

Magenta Items Used:  


0768.P Mandala Ornaments

07.1024.H Wishing You a Merry Christmas

Other Items Used:

VersaFine Ink Blue Lagoon

Iuile Watercolors (Available on Etsy)


Friday, April 30, 2021

April Showers Bring May Flowers


Welcome back to my blog and Magenta Super Saturday. There’s an old saying that “April showers bring May flowers.” The inspiration for this card comes from a card Kristina Werner posted on her blog which you can see here.

You can also see my card on the Magenta Blog here. I started my version of the card by taping a piece of watercolor paper to a solid surface (in my case it’s an old cutting board) to prevent the paper from curling.  I used my Elizabeth Craft watercolor paints and applied them in a rainbow order. 
I started with Sap Green, moved to Deep Green, Viridian, Turquoise Blue, Prussian Blue and finished with Mauve.  I set it aside to dry thoroughly before adding a second layer of paint.  You can also dry the paper with a heat tool.  For the second layer I used my Iuile watercolors which are available on Etsy.  There are multiple sizes of watercolors available but the dot cards have a lot of paint on them! They are so sparkly but they look their best on dark cardstock.  However, applying the colors over a base color created a soft, shimmery background. 
I chose colors from the Rainbow Dot Card and the Christmas Series Dot card that were similar to the colors I used in the first layer.  Also, it’s important to use a very small amount of water so the base color isn’t reactivated. 
It’s hard to capture the shimmer effect but in real life there’s a beautiful glow on the cardstock.  After the second layer of color was dry, I removed the tape and cut the piece to 4” x 5 ¼”. 
I placed it in my stamp positioner and stamped the large floral image from the “English Garden” stamp set using light green ink.  I colored the image with colored pencils then returned the piece to my stamp positioner.  I stamped the image again using VersaMark and then embossed with white embossing powder.  I repositioned the stamp, stamped again with green ink, then colored and embossed.  I stamped and embossed the “Happy Birthday sentiment then stamped, colored and embossed the floral image one more time.  
I also stamped the small leaf the comes with the “English Garden” stamp set in the lower right corner.  The last step was to adhere the image to an A2 card made from Kraft cardstock. 
One last tip, when I’m planning to stamp an image multiple times, I make a sample.  I cut a piece of scrap paper the same size as my cardstock and then use it to test my layout or in the case of this card, repositioning the stamp several times to determine the best layout. 

Thanks for visiting my blog today. 

Magenta Products Used:

07.975.I - Happy Birthday - Large

CSET47 - English Garden

Other Products Used:

Elizabeth Craft Watercolors

Iuile Watercolors (Available on Etsy) Rainbow Dot, Christmas Series Dot


Friday, February 19, 2021

Magenta Super Saturday - One Image, Three Cards

Welcome back to my blog.  I had so much fun making these cards.  I stamped and painted one large image then cut it into three pieces to create three cards.  You can also see my cards on the Magenta blog here

I stamped the Floral Background stamp onto a piece of Stonehenge Aqua Coldpress black watercolor paper with VersaMark ink, then embossed with gold embossing powder.  

I taped the piece to a board  to keep the paper flat while I painted the flowers, leaves and berries.  I used Iuile watercolors that I found on the Etsy website.  If you follow Kristina Werner, you may have seen her use these watercolors on a Christmas card (which you can see here) or a Valentine card (which you can see here.)  I am in love with the rich colors and beautiful shine of these paints. 
Iuile makes these great dot cards with very generous samples of many colors and they are very reasonably priced.  There’s more than enough paint on a card to do several projects so you can definitely try these before you decide to purchase the larger sizes.  You can see Iuile’s Etsy store here.  
After I completed the painting, I let the piece dry thoroughly.  The watercolor paper I used is kind of delicate and to get a clean cut you need to use dies or a guillotine cutter.
I used the small stitched square dies from Gina K’s Master Layout set #4 cut out two 2 3/8” squares from one side of the image.
  Then I used guillotine cutter to cut a strip 1 5/8” x 5”.    I cut pieces of coordinating solid color cardstock to mat each of the images.  I also cut cream cardstock – 3 ¼” x 4 ½” for the square images and 3 ¾” x 5” for the vertical piece. 
I stamped the sentiments and embossed the images on the cream cardstock (gold embossing powder for the happy birthday, clear embossing powder for the other two cards.)  
I positioned (but didn’t attach) each painted image on a piece of cream cardstock.  I wanted to add a bit of interest to the cream cardstock so I used VersaMark ink to stamp the small flower petal from the Petal Blossoms set a few times around the image and sentiment, then lightly brushed on Heirloom Gold Perfect Pearls. 
I adhered the cream cardstock onto pieces of solid cardstock, adhered the painted images and then adhered everything to an A2 card. 

Thanks for visiting my blog today. 

Magenta Products Used

07.588.J - It's the Little Moments

07.817.H - May the Love

07.975.I - Happy Birthday - Large

14.660.R - Floral Background

Cset46 - Petal Blossoms 

Other Products Used

Iuile Watercolor Paint

Gina K Designs Master Layout Set #4

VersaMark Ink

VersaFine Black Onyx Ink