Friday, May 24, 2019

Magenta Super Saturday - Adding Shine with Foil


Welcome back to Super Saturday.  You can also see today’s post on the Magenta blog here. 
This week I combined the beautiful, new Floral Trio stencil with foil to create a quick and easy birthday card.  I love the shine that foil adds to a card. 

I taped the stencil to a piece of textured white cardstock and applied Deco Foil transfer gel through the stencil.  (The textured cardstock gave a little bit more definition to the flower when the foil was applied.)  I removed the stencil and set it aside to dry.  Be sure to wash your stencil with warm water right away. 


I placed the piece of cardstock on a piece of wax paper to use as a carrier sheet in the laminator.  I cut pieces of teal foil and placed them over the flowers, then cut pieces of gold foil and placed them over the strips between the flowers. 

I ran the piece through the laminating machine, being careful not to move the foil.  I stamped the sentiment with VersaMark and embossed with gold embossing powder.

To finish I adhered the piece to a piece of gold cardstock and then to an A2 card and added a few embellishments.

The Floral Trio is just one of the beautiful stencils in the newest Magenta collection and I hope you will try this new technique.

Thanks for visiting my blog today!


Magenta Products Used
TM 299 - Floral Trio

07.975.I - Happy Birthday Large
Other Products Used

Deco Foil Transfer Gel
Deco Foil (Teal, Gold)
VersaMark
Judikins Gold Detail Embossing Powder

Friday, May 3, 2019

Magenta Super Saturday - New Stencils from Magenta!


Welcome back to Super Saturday.  You can also see today’s post on the Magenta blog here. 

I love, love the beautiful new stencils in Magenta’s new release. The new release also contains lots of beautiful stamps and you can see them all here.
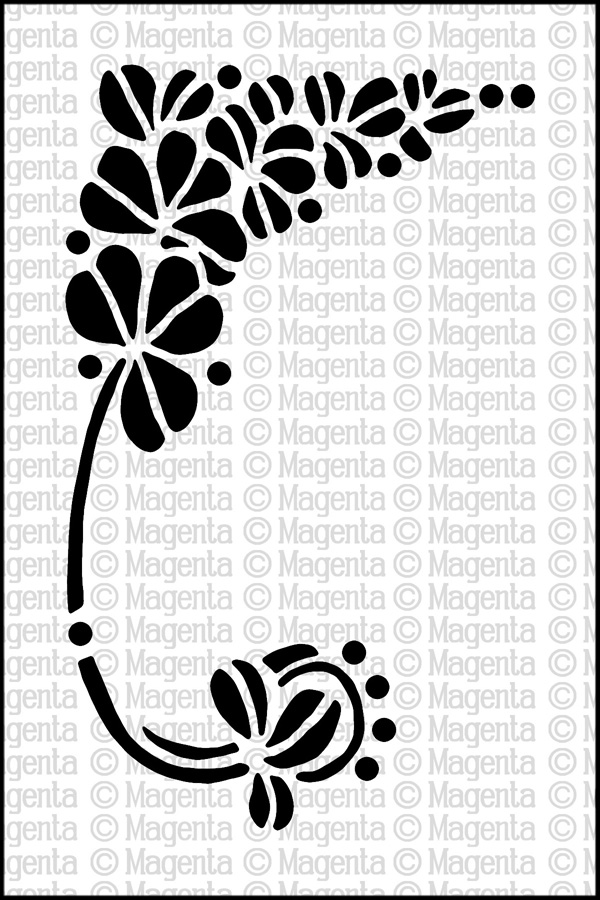
When I recently needed a sympathy card, I reached for the new Floral Corner stencil and my gold embossing paste.  I taped the stencil to a piece of navy blue cardstock that I had cut to 4” x 5 ¼”.  Since the stencil is slightly smaller than the cardstock, I also used some Post-it notes to mask off the side of the stencil to avoid getting any paste on the cardstock. 
I applied the paste then removed the tape on three sides of the stencil, leaving the tape on the top of the stencil as a hinge.  I lifted the stencil gently away from the cardstock and set it aside to dry. 
I immediately washed the stencil with warm water.
While the paste was drying, I cut a piece of gold metallic cardstock to 4 1/8” x 5 3/8”.  Then I used the Rows of Diamonds stencil, along with an embossing mat in my Big Shot to emboss the design onto the cardstock.  To create the “sandwich” to emboss the cardstock with a stencil, open the platform to Tab 1, place a cutting mat on top, then the rubber embossing mat, the cardstock, the stencil and another cutting mat.  Depending on your machine, you may need to add a shim to get the design to emboss onto the cardstock.
When the stencil paste was dry, I put the piece in my MISTI then stamped “with Sympathy” and embossed with gold embossing powder.  I assembled the layers and place them on a navy blue A2 card.  I added a few gold dots from a sheet of peel offs for an accent.

All of the beautiful stencils in the new release will work very well with embossing paste, glitter, foil, and many other applications.  I hope you will try them.

Thanks for visiting my blog today!


Magenta Products Used
TM304 - Floral Corner
TM309 - Rows of Diamonds


Other Products Used:

Dreamweaver Gold Embossing Paste
Judikins Gold Embossing Powder
VersaMark Ink


Friday, April 5, 2019

Rediscovering Zig Cleancolor Watercolor Brush Pens


Welcome back to Magenta Super Saturday.  You can also see my card from today’s post on the Magenta blog here.  


I love my Zig Cleancolor Watercolor brush pens however I admit that I struggle with getting the shading that I want.  Recently I saw a post by Kelly Latevola that inspired me to try her technique for shading and I was so happy with the results.  You can see her blogpost here.
To create this card, I stamped the 3 Poinsettias – 3 Flowers stamp on a piece of Neenah Solar White 110lb cardstock with Gina Kay Amalgam ink.  

I used Kelly’s technique to color the image with my Zig brush pens.  I applied a Sugar Almond Pink from the middle of the petal to the outer end.

Next I used a darker color on very end of the petal.  I used a different dark pink on each of the flowers – Peach Pink, Pink or Dark Pink.  I applied a very small amount of water with a fine point brush in the center and pulled it toward the color – instant blending!  
I had some help with this card.  My sweet boy Angus likes to keep me company.  
I used the same process for the other flowers.  Where petals overlapped, I waited for the intersecting piece to dry before painting the other petal to avoid any color bleeding.  I used May Green on the tendrils and the dots around the flowers and Red on the very center of the flower.
  
After the flowers were dry, I made a mask from the stamp and placed it over the colored image.  Next, I splattered gold paint over the open areas.  I stamped the sentiment in the lower right corner with VersaFine Black Onyx ink, then embossed with clear embossing powder.  I cut the image down, adhered it to a piece of light green cardstock, then adhered it to a white A2 card.


I hope you give this technique for the Zig markers a try.  Thanks for visiting my blog today!


02.318.Q 3 Poinsettias - 3 Flowers


Other Products Used:

Zig Cleancolor Waterbrush Pens
Gina Kay Amalgam Ink
VersaFine Black Onyx Ink

Friday, March 8, 2019

Magenta Super Saturday - Spring is coming!


Welcome back to Super Saturday.  You can also see today’s post on the Magenta blog here.  We’ve received a record-breaking amount of snow in the Pacific Northwest in February.  I was snowed in for a few days, so I decided to make a card to remind me spring was coming soon.   


To create this card, I made a mask by stamping the Potted Flowers on a piece of masking paper and then cutting it out.  In my MISTI stamp positioner I lined up the stamp where I wanted it on a piece of 4 ¼” x 5 ½” white cardstock and then placed the mask over that area.  


Using an ink blending tool I lightly applied Shabby Shutters and Tumbled Glass Distress Oxide inks around the mask – be sure to use a light touch so that you don’t get a ridge of ink that can’t be blended away.  

I removed the mask and added more ink, overlapping lightly into the area that would be stamped.  I added Broken China and a touch of Faded Jeans Distress Oxide ink to the blue part of the background and blended until there was a smooth transition of color.  

When the ink was dry, I returned the cardstock to my Misti and stamped the Potted Flowers with VersaFine Black Onyx ink.  

When the ink was dry, I colored the image with colored pencils (the colors are listed below.)  I returned it to my MISTI one last time, stamped with VersaMark ink, then embossed with clear embossing powder.  Lastly, sprinkled a bit of water over the blue inked area. 

I trimmed the image down and matted it to a piece of black cardstock and then to a piece of purple cardstock before adhering it to a white, A2 card.  I added a few clear Nuvo drops on the petals and leaves. 

For the sentiment I shaded a piece of white cardstock with Tumbled Glass and Shabby Shutters Distress Ink.  When the ink was dry, I stamped the sentiment with VersaFine Black Onyx ink and embossed with clear embossing powder.  I trimmed the sentiment down and added it to the card with a piece of foam tape for some extra dimension. 

Thanks for visiting my blog today!
Magenta Products Used:

0586.Q Potted Flowers
07.952.F Sending Sunshine

Other Products Used:


Prismacolor Pencils (Pale Sage, PC 1089; Peacock Green, PC907; Spring Green, PC913; Magenta, PC930; Crimson Lake, PC925; Mulberry, PC 995; Deco Pink, PC 1014; Lilac, PC 956; Parma Violet, PC1008; Yellowed Orange, PC1002; Spanish Orange, PC1003; Orange, PC 918; Pale Vermillion, PC921)
Distress Oxide Inks (Shabby Shutters, Tumbled Glass, Broken China, Faded Jeans)
VersaFine Onyx Black ink
VersaMark 
Nuvo Drops

Friday, February 15, 2019

Magenta Super Saturday - Happy Birthday


Welcome back to Super Saturday.  I need to make a bunch of birthday cards for family and friends who have birthdays in the coming weeks.  You can also see my card on the Magenta blog here.

I have always loved the vertical Happy Birthday stamp so I paired it with the Floral Tile stamp to create this card.
 

I patted light colors of Distress Oxide inks on my craft mat (Antique Linen, Tumble Glass and Bundled Sage) and sprayed liberally with pearly water (Perfect Pearls mixed in water.)  I dabbed two pieces of heavyweight white cardstock onto the ink, dried it with my heat gun and repeated until I had the coverage I wanted.  I did both pieces at the same time because I wanted the colors to be similar on both.

When the cardstock was dry, I used my MISTI and VersaClair Oasis Green ink to stamp the cardstock with the Floral Tile stamp. 
I colored the images with a variety of Prismacolor pencils, then returned it to my MISTI in the same position.  
I stamped again with VersaMark ink and embossed with clear embossing powder.  I stamped the happy birthday on the second piece of cardstock and embossed with clear embossing powder.


I trimmed the pieces down and adhered them to a piece of Fair Blue So Silk cardstock and then to the front of an A2 card.  I added a few accents with Nuvo Morning Dew drops.
Thanks for stopping by today.
Magenta Products Used:
R.0427 Floral Tile

07.430.I Happy Birthday


Other Products Used:
VersaFine Clair Green Oasis
VersaMark
Prismacolor Pencils (Pale Sage, PC 1089; Peacock Green, PC907; Spring Green, PC913; Magenta, PC930; Crimson Lake, PC925; Mulberry, PC 995; Deco Pink, PC 1014; Lilac, PC 956; Parma Violet, PC1008; Yellowed Orange, PC1002; Spanish Orange, PC1003; Orange, PC 918; Pale Vermillion, PC921)


Monday, February 4, 2019

Magenta Super Saturday - Happy Valentine's Day


Welcome back to my blog and Magenta Super Saturday.  Recently I’ve been making lots of Valentine’s Day cards for a project at my church so I thought I’d share one of them with you today. 

I used the Wavy Texture stencil and Heart Burst stamp.  Magenta has so many great heart stamps that work so well for Valentines that it was hard to choose one.  You can also see this card on the Magenta blog here.
I taped the Wavy Texture stencil to a piece 5” x 3 ¾” Kraft cardstock so I could run it through my Big Shot.  I used Tab 1 of the main plate, then a cutting plate, the rubber pad, then the paper and stencil (with the stencil on top) then another cutting plate.  You may need to experiment with your machine until you get the right amount of thickness.  


After running this through the Big Shot you can see the impression of the stencil on the paper.  Before removing the paper from the stencil, I patted a VersaMark pad over the surface.  I removed the stencil and covered the surface with Wow Pearl Gold Sparkle Embossing Glitter.  

I stamped the Heart Burst with VersaFine Clair Glamorous (Red) ink on a piece of 2 1/8” x 2 1/8” square of Kraft cardstock, then embossed with the same embossing powder.  I stamped with the red ink so that the heart would stand out a bit more on the Kraft cardstock.  I ran the edges of the square along a VersaMark pad and then dipped each edge in the gold embossing powder and heat set it.  This provides just a touch of gold sparkle along the edges.

To assemble, adhere a piece of 4 1/8” x 5 3/8” red linen to the front of an A2 Kraft card, then adhere the embossed piece on top.  Adhere the heart image to a 2 ¼” x 2 ¼” square of red linen.  Apply a piece of Fun Foam to the back.  To finish the card, tie a bow with gold twine, adhere it to the Fun Foam and then adhere it to the front of the card. 

I love embossing with stencils because of the great texture it adds to a card.  I hope you will give it a try.  Thanks for visiting my blog today!
Magenta Products Used:
TM222 Wavy Texture

42.237.H Heart Burst


Other Products Used:
Wow Pearl Gold Sparkle Embossing Glitter
VersaFine Clair Glamorous Ink
VersaMark Ink


Friday, January 4, 2019

Magenta Super Saturday with Pam - New Year's Thank You

Welcome back to my blog.  I hope that your new year is off to a great start.  I have a fun card for “Super Saturday with Pam” which you can also see on the Magenta blog here.

The technique for this card uses alcohol ink and watercolor paper.  I saw it on Jennifer McGuire’s blog and you can see her video here.  She mentioned that she’s been using the technique for a long time so perhaps this technique won’t be new for you.  With this technique you can make several pieces very quickly so I thought it was perfect for making a bunch of thank you cards.
To start I taped the Magenta “All Over Stars” stencil to a piece of Tim Holtz watercolor paper.  I like the Tim Holtz paper for this technique because it is bright white.  I used a VersaMark ink cube to cover the front of the paper with ink.  I removed the stencil then covered the inked areas with clear embossing powder and heat set the powder.  If you watch Jennifer McGuire’s video you will see that she tries other colors of embossing powder.  I did that too and have some pictures of those pieces at the end of this post.
I applied alcohol ink (Patina, Turquoise, Sailboat and a small amount of Silver Mixative) to a felt applicator along with a generous amount of blending solution.  The watercolor absorbs the ink and blending solution quickly so if the colors isn't moving around like you want, apply more blending solution to your applicator.


I pounced the color all over the watercolor paper until the whole card front was covered.  (For a different look, rather than pouncing the color, you can also brush the color in even, back and forth strokes over the card panel.)  The embossing powder acts as a resist so some of the white paper will show through from beneath the embossed area.  Also, some of the color will sit on top of the embossed surfaces.

To finish off the card, I used a 2 ½” oval die from the Hero Arts Nesting Ovals set to cut out the center of the stenciled panel and to also cut a piece of silver metallic cardstock.  I stamped the medium “Thank you” with VersaMark on a piece of white cardstock and embossed it with Wow Metallic Silver Sparkle embossing powder.  I die cut this with a 2 ¼” oval die from the same set and also used the same die to cut a piece of fun foam. 

I adhered the stenciled panel to the front of an A2 card.  Then I adhered the fun foam oval to the back of the silver paper, then adhered the sentiment on top and positioned it on the card.  I added a few clear gemstones in the center of each star for a bit more shine. 

I couldn’t stop playing with this technique so I tried it with a few other stencils and ink colors.  It’s fun to experiment with how the ink is applied as well different colors and combinations of alcohol ink and embossing powders.  I'll list the stencils and embossing powders below.

The only down side to this technique is that it doesn’t photograph well.  The camera just can’t pick up all the shine that you get with this technique.  I hope you will give it a try to see it in person.
Thanks for visiting my blog.  All the best to you in the coming year.  
Magenta Products Used:
07.979.G - Medium Thank You


Other Products Used:
VersaMark Ink
Judikins Clear Embossing Powder
Alcohol Inks
Magenta TM229, Laces Texture (with Irisdescent Sparkle EP and Indigo Blue Alcohol ink)
Magenta TM252, Flying Butterflies (with Hero Arts White Satin Pearl EP and Sailboat, Amethyst and Aquamarine Alcohol ink)
Magenta TM65, Bubbles (Clear EP with Wild Plum, Aquamarine and Indigo Blue Alcohol ink
Magenta TM165, All Over Rectangles (with Silver Pearl EP, with Sailboat, Amethyst and a tiny bit of Indigo Blue Alcohol ink)
Hero Arts Nesting Ovals
Wow Metallic Silver Sparkle Embossing powder